SLX Developer Knowledge Base

Tips, Tricks, & Troubleshooting

WordPress Onboarding Process

WP Onboarding Process Steps Flow Chart

Step 1 - Create WP Engine Server Environment

To create a WP Engine (WPE) server, first, you must log in to the respective WPEngine account. Once signed in on the top right-hand side, there should be a button that says “Add Site.”

WPE will ask you if you want the site to count towards your site allowance. Select “The site is mine.” Next, you’ll have to select how you plan on adding the site to your account. There are a few options. Please choose the appropriate one for the task at hand. Most commonly, we are migrating a site, copying an existing environment (creating a staging server), or starting with a blank site.

Lastly, you’ll have to enter the desired information for the site you want to add, i.e., the site name.

Step 2 - Load in Site Content Into WP Engine

If this is a new site you will not have to worry about this step. If you have access to the client’s old site the easiest option is to use WP Engine Automated Migration plugin (https://wordpress.org/plugins/wp-site-migrate/). Here is a link to instructions on this plugin from the WPE document (https://wpengine.com/support/wp-engine-automatic-migration-powered-by-blogvault/). If we do not have access to the WP admin account, you will need a file called the “public_html or www” from the client’s old server. We can get this file by requesting the client send it over, asking their supporters to share it with us, or using an FTP service to download it from the client’s server. Once we have this file, reach out to WPE support and ask them to update the site with the folder containing all the site’s older files. 

Step 3 - Set Up Staging Environment

To set up a staging account, you will need to go to the overview page for the site you want a staging account. Once there, you can click “Add Staging” on the left-hand side.


The next screen will give you a few options, but we only need to use “Copy an existing environment to this site.” Below we will fill in which environment we want the staging site to be a copy of and the date of the backup you want to use. 


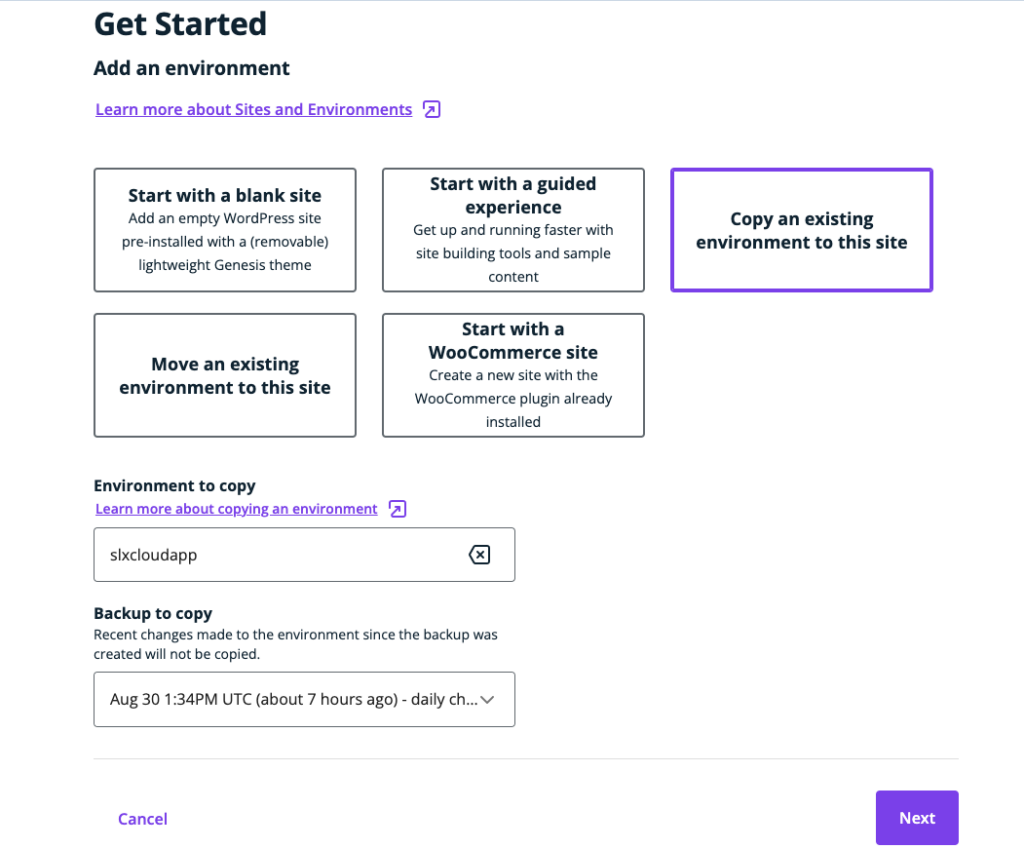
Lastly, you can enter the environment name and the environment type.


Step 4 - Mirror Site Content Into Staging Environment

To mirror a site into staging on WP Engine (WPE) takes a few steps. On the overview screen, there should be a button on the top-right side that says “Copy Environment.”

 On this screen, you can select your “source environment” (the environment you want to copy from) and “destination environment” (the environment you want to copy to). The next option is what you want to include. WP Engine docs state, “The file system includes media, images, stylesheets, plugin files, scripts, wp-config.php, etc. The database includes all posts, pages, users, custom post types (EX: WooCommerce orders), and certain settings.” Lastly, you can select if you want to receive a notification. Please make sure to change the email address to your email address. 

Step 5 - Audit WP Staging (Site, Plug-ins, WP Version)

To Audit a WP staging account, open the live site in another window to use as a reference. Staging sites should be identical to live, so if you see any differences that’s a sign that something went wrong. Occasionally the client has features on their site that won’t work or show in staging. Commonly this will be features like chatbots, premium plugins, or site login functionality. It’s also important to make a note of what builder the client’s WP site is using because if it’s not Elementor we will have to add Elementor to their account.

To audit the plugins on the WP account go to “Plugins” on the left navigation bar and click the “Installed Plugins”, make notes of all the deactivated plugins in order to remove them later (If the plugin says “Activate” that means that it is currently deactivated).

You can find the WP version under “Dashboard” on the left nav bar. Click “Updates” from in the dropdown menu and note the current version and the updated version available.

Step 6 - Update WP Staging (Admin Email, Site, Plug-ins, WP Version)

To update the admin email, navigate to “Settings” -> “General” on the left WP nav bar. In the settings page update the “Administration Email Address” to the SLX email address that has been created for the new client (If not provided to you, reach out to the AC and request the email address for this, it should have this naming structure: slx+[brand name]@saleslabx.com.

On the same “Dashboard” -> “Updates” screen from step 5, Click to update the WP version, scroll down and update the plugins and themes as well.

Step 7 - Review The Site For Any Errors Related To The Update

Similar to step 5, compare the live site to the staging site again to identify if anything got broken or weird looking after the updates that were made during step 6.

Step 8 - Install Elementor

Go to “Plugins” -> “Add New” in the left nav bar and type “Elementor” in the search bar. Click “Install Now” on the Elementor plugin (should be showing first on the left). Installation will take a few seconds and when it done, click the “Activate” button. After activation the Elementor will be active on the site.

At this point, Elementor PRO will need to be activated on the site.

To install Elementor Pro the file must be downloaded from Elementor.com. This file can only be downloaded once logged in to the SLX account. The login information can be obtained from one of the Team Leads. 
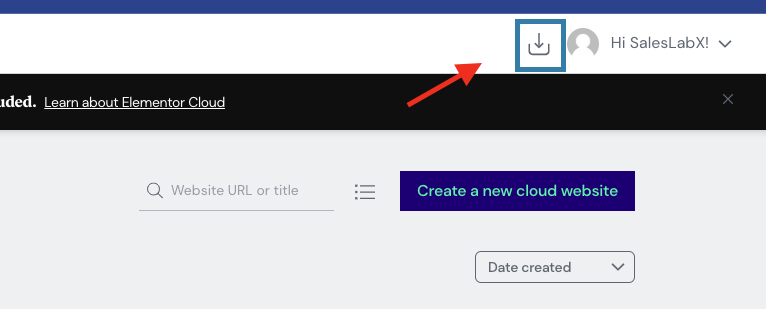
To install this file you must go to the WP dashboard then plugins > add new. Once on this screen on the top left-hand side, there should be a button that says “upload plugin.” 
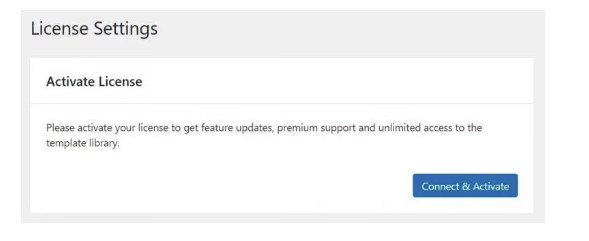
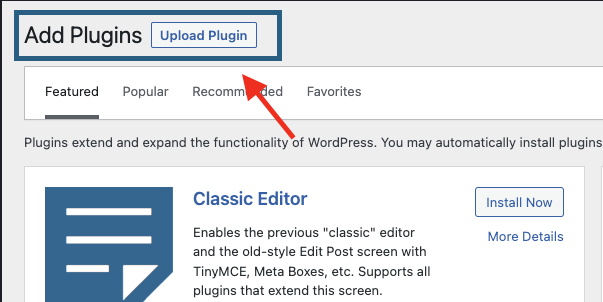
Upload the Elementor zip file and follow the instructions to install it. To activate Elementor pro you must go to your WP dashboard and select Elementor > License.You will see a screen to activate your license. Just click “Connect & Activate.” Then it should take you to Elementor and you have to do here is click “Connect” once more.

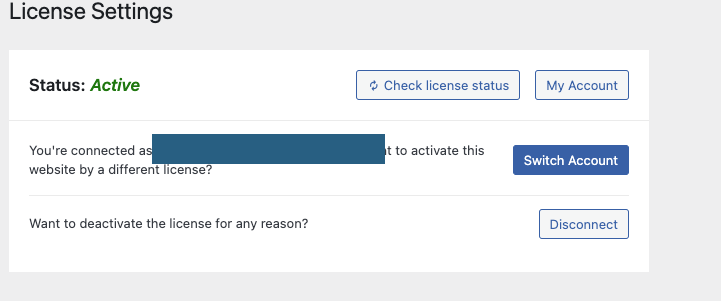
If the plugin is successfully installed when you go to WP dashboard > Elementor > License you should see this screen. You can also check by creating a new page and editing it with Elementor. If Elementor pro was installed successfully you’ll have access to the pro widgets.

If you have any issues you can reference this doc (https://elementor.com/help/installing-elementor-pro/) or reach out to someone on the Dev team.

Step 9 - Review Site For Errors Related To Elementor Installation

Similar to step 5, compare the live site to the staging site again to identify if anything got broken or weird looking after the updates that were made during step 8.

Step 10 - Create Elementor Header/Footer Templates

At this point Elementor is ready for the design team to create the header and footer templates. 

For designers: Under “Templates” -> “Saved Templates” click to “Add New” template. Choose the correct template type (header for the header template and footer for the footer template), give the template a name and click the green “CREATE TEMPLATE” button. The template will open in the Elementor editor, and now you are ready to start designing it.

Step 11 - Remove Old Header/Footer From The Site

After the Elementor templates has been created by the design team, investigate and determine how the old header and footer were set up in the site. Once Identified, remove the plugin that is associated with it. This should remove the old header/footer from the site pages.

Step 12 - Apply New Approved Header/Footer To The Site

Navigate to the newly created header and footer Elementor templates (header/footer) and click “Edit with Elementor”. In the editor Click on the little ^ arrow next to the Updat/Publish button on the bottom left of the screen. In the dropdown menu, click “Display Conditions”. A pop-up window will appear asking “Where Do You Want to Display Your Template?”. Make sure it is set to “INCLUDE” and set the field to “Entire Site”. After that you can click the green “Save & Close” button and the template will be implemented across the site. Do the same for both header and footer templates. 

Step 13 - Review Site For Header/Footer Related Errors

Similar to step 5, compare the live site to the staging site again to identify if anything got broken or weird looking after the updates that were made during step 12.

If the Elementor header and footer causing the client’s old pages to break, the process now will have to go to a recreation of all existing site pages with Elementor. The design team will recreate the pages as close as possible to the originals.

Step 14 - Approve WP Staging Site With Client

Send the staging WordPress site url to the account coordinator for client approval.

Step 15 - Mirror WP Staging To Live WP

Mirroring a site into live on WP Engine (WPE) takes a few steps. First and most importantly, make a backup of live. On the overview screen, there should be a button on the top-right side that says “Copy Environment.”

On this screen, you can select your “source environment” (the environment you want to copy from) and “destination environment” (the environment you want to copy to). The next option is what you want to include. WP Engine docs state, “The file system includes media, images, stylesheets, plugin files, scripts, wp-config.php, etc. The database includes all posts, pages, users, custom post types (EX: WooCommerce orders), and certain settings”. Lastly, you can select if you want to receive a notification. Please make sure to change the email address to your email address. 

Step 16 - Approve Live WP Site With Client

Send the live WordPress site url to the account coordinator for client approval.

Step 17 - Update Client’s DNS With New WP Engine IP Address

Provide the WPEngine’s live environment IP address to the account coordinator so they can send it over to the client.

In WPEngine, under the initial screen (sites), navigate to the production environment of the new brand and click to edit. On the nav bar to the left of the screen, navigate to “Domains” and click it. Scroll down to the bottom of the screen and copy the “A Record number (this is the site’s IP address). Provide that number to the AC.