Welcome to SalesLabX! We’re thrilled to have you be part of our growing team. This training manual will give you an overview of what it means to be a Quality Assurance Specialist at SLX, provide essentials steps for your onboarding process, as well as serve as a reference you can use throughout your time with us.
You might be wondering just what the heck our company does exactly. For the most part, we exist because Pardot and Salesforce are very prevalent tools in the B2B marketing space, but they are quite complicated for the average user. We happen to specialize in marketing using these platforms! Pardot and Salesforce are extremely powerful sales and marketing tools that allow companies to manage and nurture prospective and existing customers and to apply automated targeted marketing strategies to those contacts. There are almost limitless ways to use this software to increase a company’s audience reach and sales, but the tool isn’t always very user-friendly or stylish. Many companies get locked into a contract with Pardot/SF and their marketing teams lack the technical knowledge to take full advantage of the tool.
This is where SLX comes in. We provide Pardot and Salesforce strategy consulting and execution, as well as access to talented coders and designers that can make communications from Pardot and Salesforce look exponentially more professional and sleek than what a typical marketing employee using the interface could do on their own. There are other companies in the market that offer similar services, but typically they are very expensive, have long turnaround times, and involve lots of scope creep and friction. Our advantage comes from the fact that we offer unlimited access to these resources on a subscription based model to eliminate friction and scope creep. We bring companies’ marketing goals and ideas to fruition in what feels like a magically convenient way. The goal is to make them feel like our product (the SLX subscription) is custom-built for them by integrating seamlessly into their strategy and workflow so well that they can’t imagine doing it without us.
As a QA Specialist you have the responsibility of reviewing and checking all the assets created by our lovely production team to ensure they are of the highest possible quality for our clients. After all, human error is inevitable, but we’d like our partners to remain blissfully unaware of that!
Your Department Lead is Kristina Doan, Director of Account Partnerships, kristina.doan@saleslabx.com.
Your Team Lead is Shan Koay, Head of People and Internal Operations, shan.koay@saleslabx.com
Check out our organization chart on Gusto to see everyone at SLX!
How to View our SLX Org Chart:
Feedback for Leadership: Feel free to request a chat with leadership any time. You will also have monthly one on one meetings with your team lead to check in and discuss your progress, go over suggestions/requests you may have, etc.
Here at SLX, we use Google Suite as our main communication and organization platform. The first step is to set up your Gmail account settings:
Enable Screen Sharing and Recording
Note: If Loom or screen sharing is not working, you will need to enable screen sharing and recording again.
Recommended Bookmarked Sites:
Recommended Chrome Plugins:
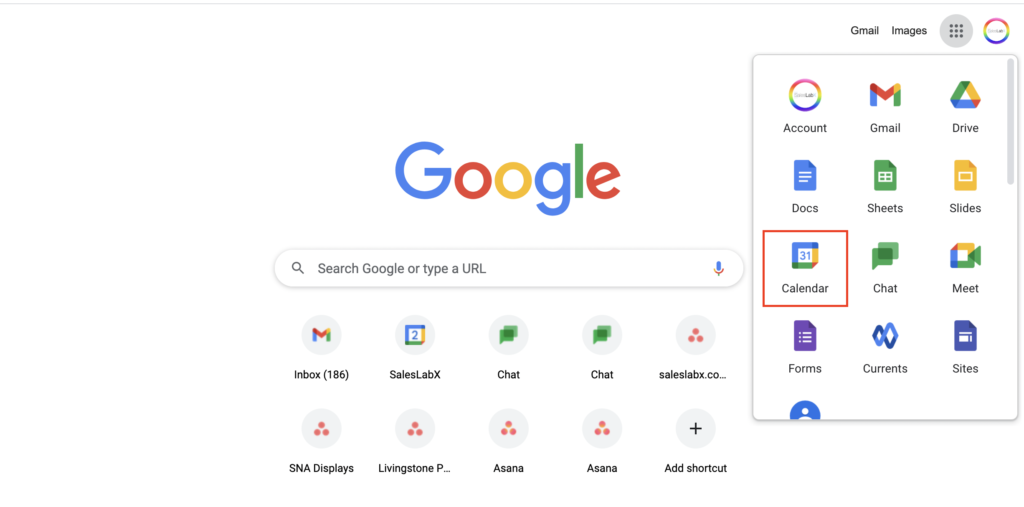
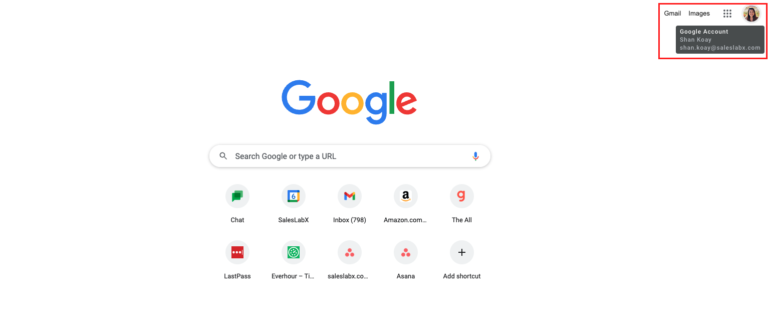
At SLX, we use Google calendar to display all team huddles, internal events (such as Happy Hours, Learning Labs, etc), and sessions with fellow teammates. Access your calendar here or by opening your browser window and clicking on Google Calendar (see screenshot below).
How to View Other Team Members’ Calendars:
How to Schedule Internal Meetings with Team Members:
Sharing Your Calendar with HR and Your Team Lead:
In case of an emergency time off, our HR (People Ops) team or your team lead will need access to your calendar to set your Out of Office notice and inform your clients. Please share your calendar with hr@saleslabx.com and your team lead. Here’s how to do so:
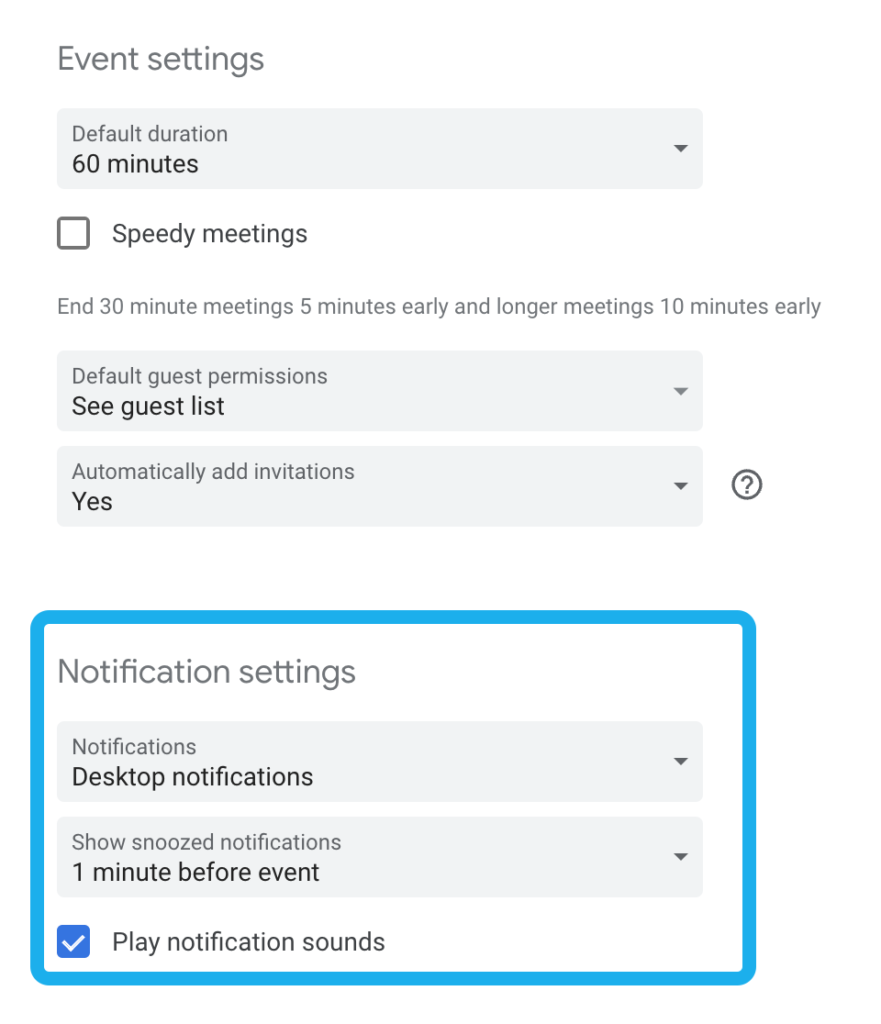
Calendar Best Practices

When you take time off, you’ll be asked to create an “Out of Office” Event in Google Calendar. Here’s a quick video showing how to do that. For more info about our PTO policy, please visit the SLX Perks & Policies page.
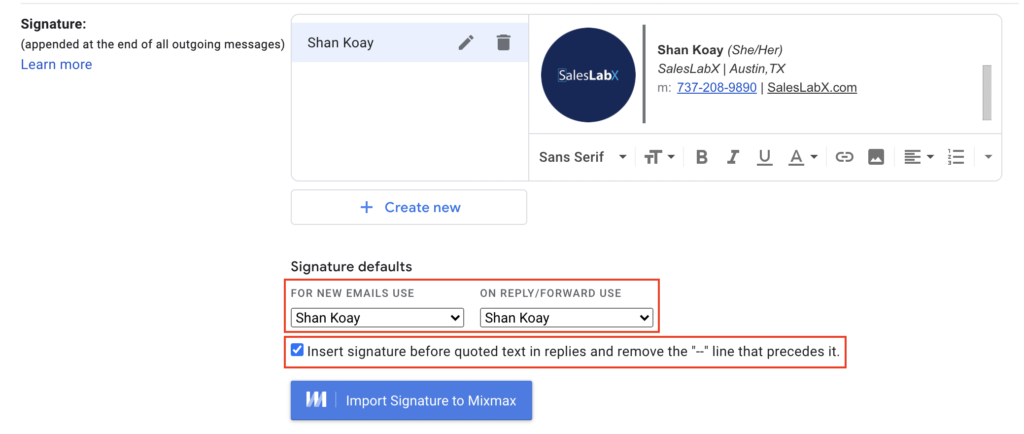
Setting Up Your Email Signature
Email Best Practices
File Management:
We use Google Drive as our main file storage and sharing system.
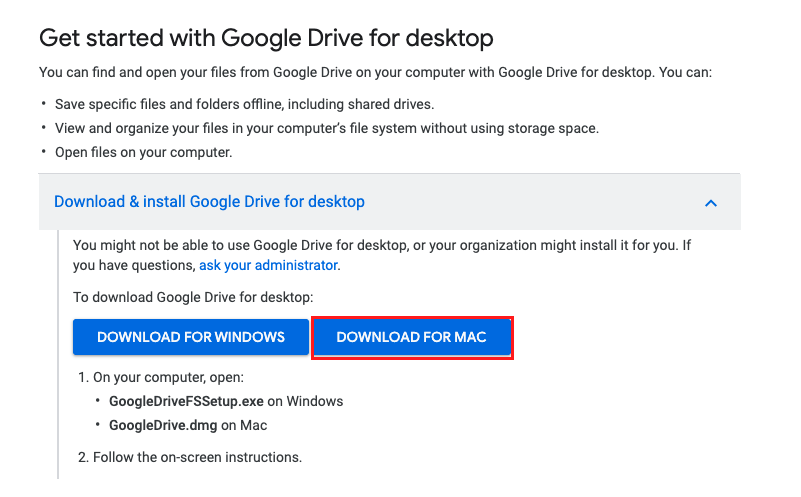
To use the Shared Google Drive you’ll need to be invited to SLX’s team. If you are unable to access it, please ask your trainer to invite you. Once you have access to the shared drive, you will need to download the Google Drive sync for desktop:
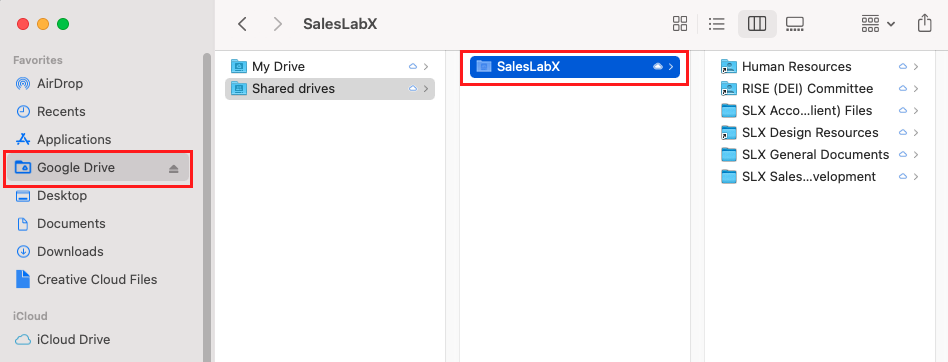
If Drive is installed correctly, you’ll be able to see ‘Google Drive’ on your left navigation panel when you open up your Finder window (see screenshot below).
Sharing Files Internally
At SLX, Google Chats is used for 1:1 and group communication! While you can access Gchat from your Gmail inbox, we recommend downloading the desktop app for a better user experience. Communication here at SLX is very open as we work collaboratively with all other teams on a daily basis. Use Google Chat to message teammates to connect about tasks, ask questions, hop on a quick call, or get to know one another!
Follow these instructions to download the desktop app.
Inviting Someone to Chat
Inviting Someone to Connect Via Google Hangouts
Sometimes, it’s faster to hop on a quick call to discuss a task or get a question answered. Within your chat box, you have the option of sending a Google Hangouts (video) link. Click on the camera icon as shown below.

A Google Hangouts link will auto generate as shown below. Press enter to send the link to your teammate. Hop in the link to chat with them!

Groups
Upon joining the team, you’ll be added to the following internal chat groups:
You will also be added to your respective team huddle group and a few others along the way.
Chat Notifications and Settings
Click on the wheel icon on the top right of your app to manage chat settings. Learn more about Google Chat Notifications here.
Google Chat Best Practices
NordPass is our password manager tool and is used to store login information for internal platforms and clients’ accounts. You’ll be invited to join NordPass on your first day. Click below to read our NordPass Guide, including how to set up your account and use the tool. Do not move onto Step 7 until you have completed all the steps in the NordPass Guide.
You will be working in different Pardot environments for each of our clients. All clients have separate Salesforce accounts that you will need to log into frequently to access Pardot and complete tasks. Some accounts will also have a WordPress website that we manage, and/or social media accounts. The best way to keep these accounts and their separate login credentials organized is to create separate Google Chrome Profiles for each account. But first, let’s make sure your personal Chrome profile is set up correctly and that you can access the shared Design email (read below for why this is important).
How to Set Up Your Chrome Profile
How to Sign Into the Design Gmail
The design@saleslabx.com Gmail is a shared inbox for everyone at SLX. This is where you can locate all client Salesforce verification codes. You’ll need to set this up before setting up Chrome profiles for clients. To do this:
Google may ask for a verification code to confirm your identity.
If prompted with a screen that says a code was sent to an iPad, choose “Try another way.”
Select the option to send the code to a phone instead.
Contact HR (Stephen Chung) via message to obtain the verification code sent to the phone.
Enter the code to complete the sign-in process. Once successfully signed in, you’ll know you’re in the correct profile when you see the blue “D” avatar in the top-right corner of your Chrome browser window.
How to Set Up Account Profiles in Chrome:
Now that you have your personal Chrome profile set up and can access the shared Design Gmail, you can set up Google profiles for all clients. Follow the written steps below or refer to the instructional video:
Asana is our main project management tool, used to organize, track, and manage tasks. You’ll be working in Asana on a daily basis. If you’re not familiar with the basics of Asana, please begin by reviewing the below guides and tutorial videos:
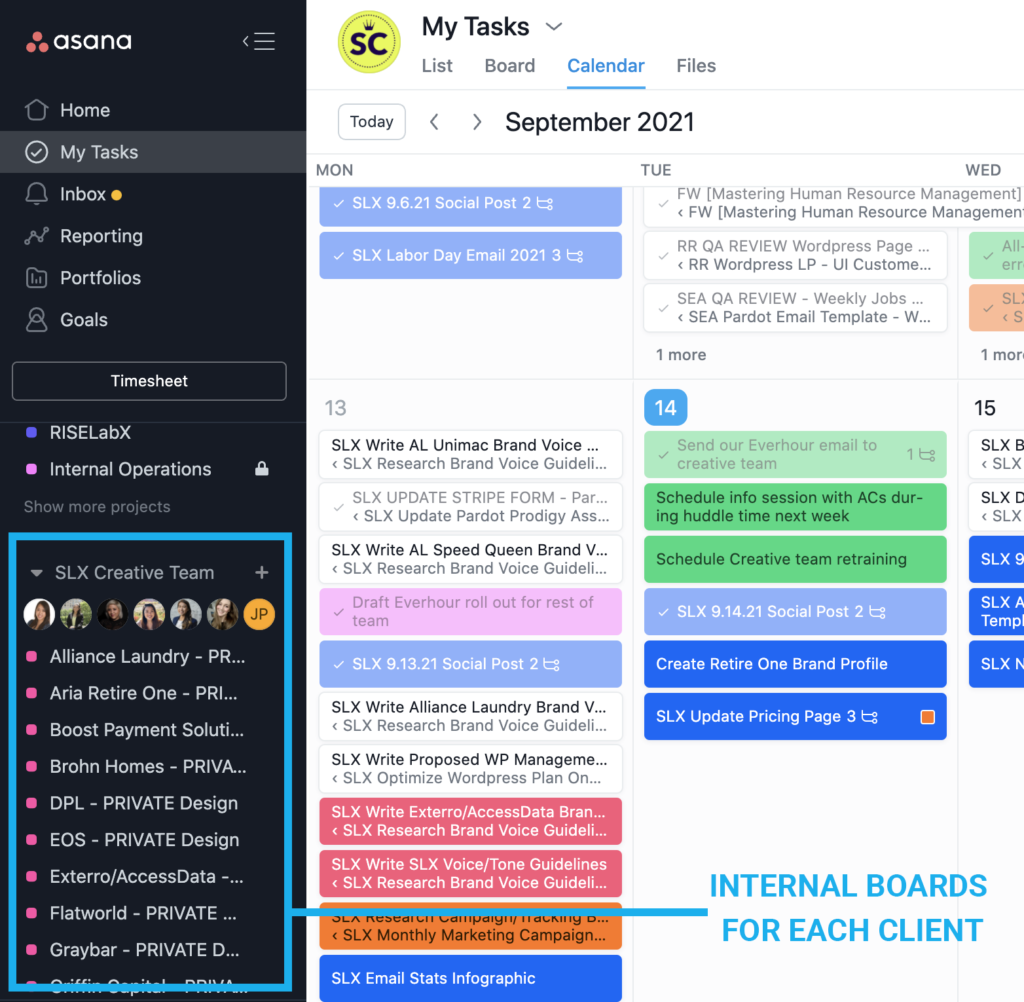
We have both internal and client-facing Asana boards for each account. The internal boards are what the Design, Salesforce, Development, and Pardot teams see. The client-facing boards are what the clients see. Only Account Coordinators have access to manage both boards.
Teams, projects, and tasks are the key to our workflow in Asana. Here’s how they look using the Calendar view.

Learn more about Asana’s calendar view here.
Asana Teams
At SLX, we use Teams a little differently. Teams are used to organize a set of projects (boards). You will be added to the relevant teams during your on-boarding process and can access them through your left navigation bar under ‘Teams’.

Asana Projects (also known as Boards)
Projects are created under teams. A team can have multiple projects. Each client account has their own project, also referred to as boards. We have internal boards and external boards. Internal boards are accessed by our internal teams. And external boards are accessed by our clients. As an AC, you will work daily in boards to manage tasks, set deadlines, communicate with clients, and collaborate with other internal team members.


Task Cards
Tasks are essentially our “tickets”. Clients request tasks and it is the job of the ACs to help clients to accomplish their requests by building out the task on the internal board in Asana, where it can then be assigned to you and your teammates.
Task Fields
Within task cards, the standard fields we use are:
In general, these fields are almost always updated by ACs and Team Leads, so you will not be responsible for configuring or updating them.
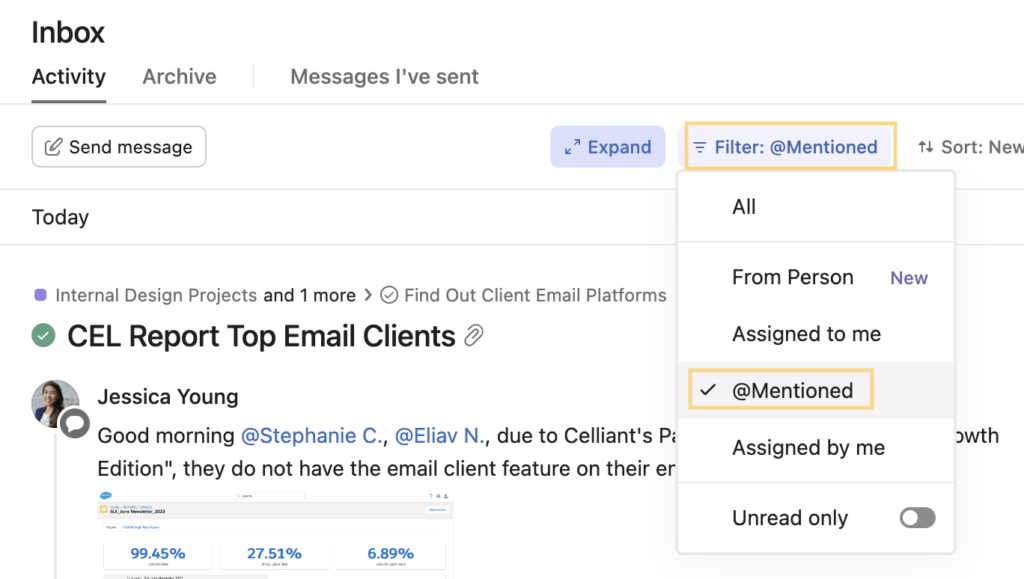
Mentions and Collaborators
Watch our video below to learn more about Mentions and Collaborators.
Asana Inbox
Your Inbox is where you will receive notifications about recent activity on tasks you are involved in. It’s important to check your Asana inbox regularly throughout the day so you don’t miss updates or approvals. To learn more about Asana Inbox watch the tutorial below and read this guide.
How to Update Task Templates in Asana:
As part of your duties, you may be asked to help maintain QA checklists as we update our process and learn about client quirks. To do this, you will need to access the Asana task templates.
On the left sidebar under SLX Creative Team you will see all client boards. Each one must be updated separately.
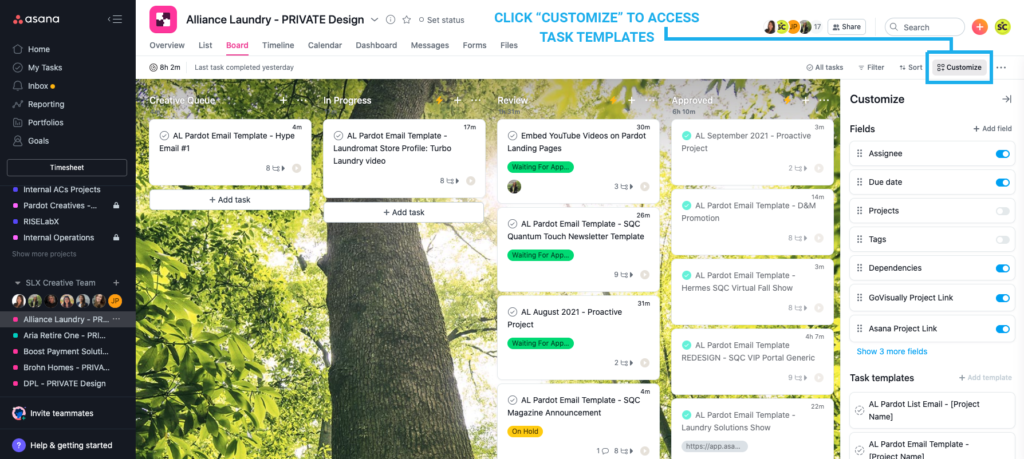
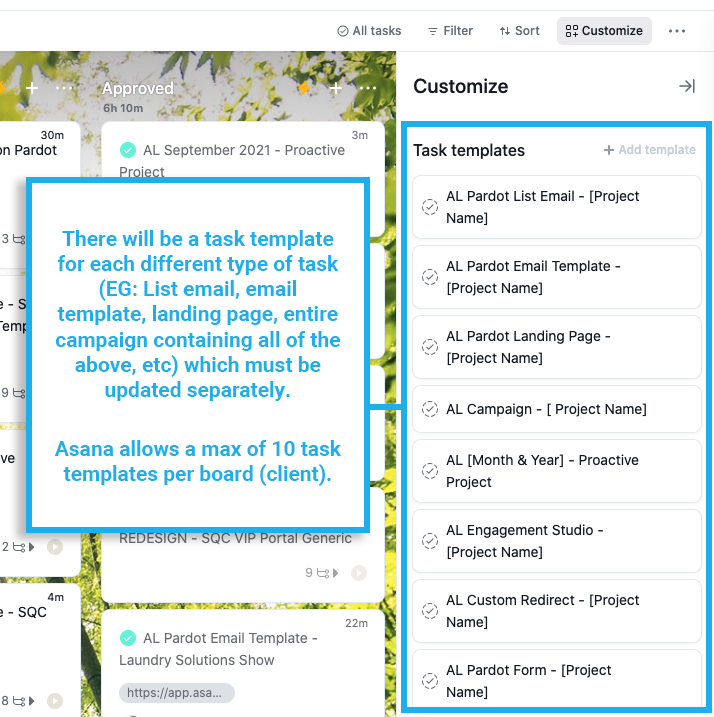
Scroll down within the column and click “See more templates” to view all Task Templates for that client board. Asana allows up to ten different templates per board. You’ll usually find one for List Emails, one for Email Templates, one for Landing Pages, and one for entire Campaigns which can contain multiple emails and landing pages.
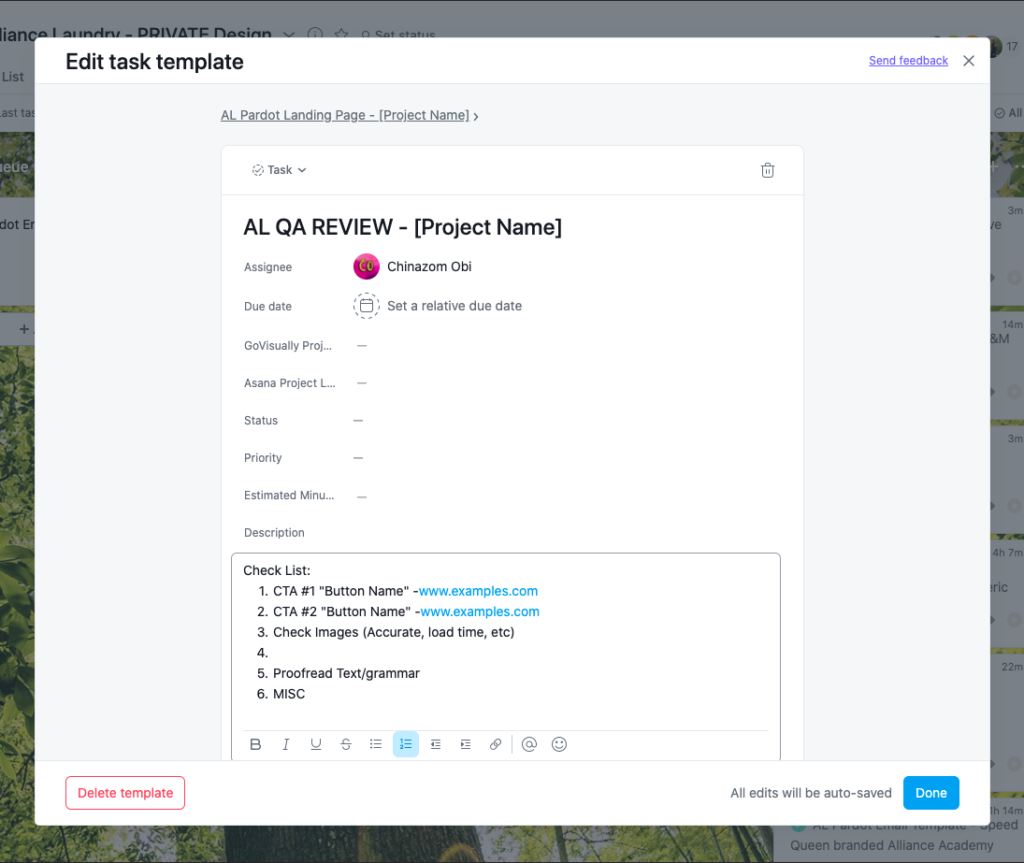
You will need to click into each task template individually to update the template. Once you click into the task template you will see all the subtasks, including the QA REVIEW subtask where your checklist lives. You can edit the checklist by typing in the task description for the QA REVIEW subtask within that task template.
Questions/issues with a task in Asana?
Message your Team Lead + the appropriate AC in a group chat to keep them both in the loop. We recommend setting a reminder for yourself at 2:00pm to check in with your to-do list and make sure you are on track to finish everything that’s due by the end of the business day.
Not sure which AC is associated with which account(s)? Check the Collaborators listed at the bottom of the Asana card, or check out this handy dandy spreadsheet: SLX Account Ownership
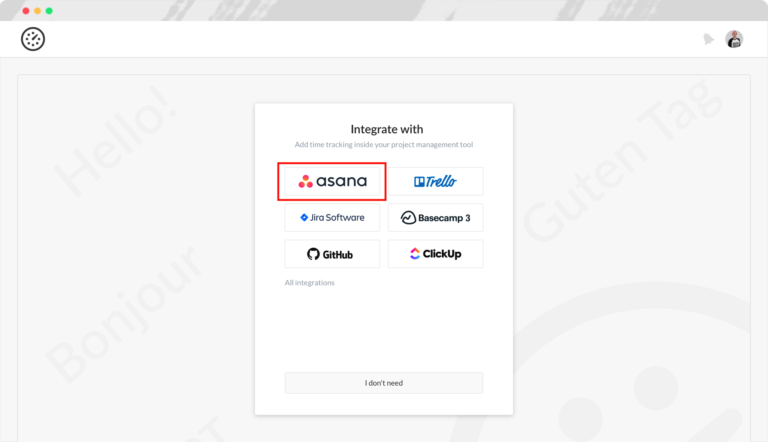
Everhour is a time tracking tool that integrates with Asana. With Everhour, you can track how much time you spend on each task. We use Everhour to collect baseline data, including which parts of your role could be made more efficient, what types of tasks are the most time consuming, and which accounts are monopolizing your time. Our goal is to help you as an AC better balance your workload, expand your bandwidth, improve productivity, and better manage client expectations. Everhour helps us collect the data we need to make informed decisions.
How to Access Everhour and Integrate it with Asana


How to use Everhour (and Best Practices)
To log non-client tasks: For tasks such as completing your performance review forms, voting for awards, goal updates in Lattice, etc…, use your relevant team board below, create a task, log your time, and close the task out when done:
Designers and Creative Writer: Use the Internal Design board
Developers: Use the Internal Dev board
ACs and SF Dev: Use the Internal ACs Projects board
Leadership: Use the ELT board
QA: Use the Internal Ops board
People Ops: Use the Internal People Ops board
RISE Ambassadors: Use the RISE board for RISE-related tasks
GoVisually is a proofing tool used by our design team to provide design proofs for internal review (that’s you!) and then to our clients.
How to Access GoVisually

What is Figjam?
How Figjam is organized (internal vs external folders)
Figjam is organized in external and internal folders per client. Each client will have three folders in total (see below screenshot).
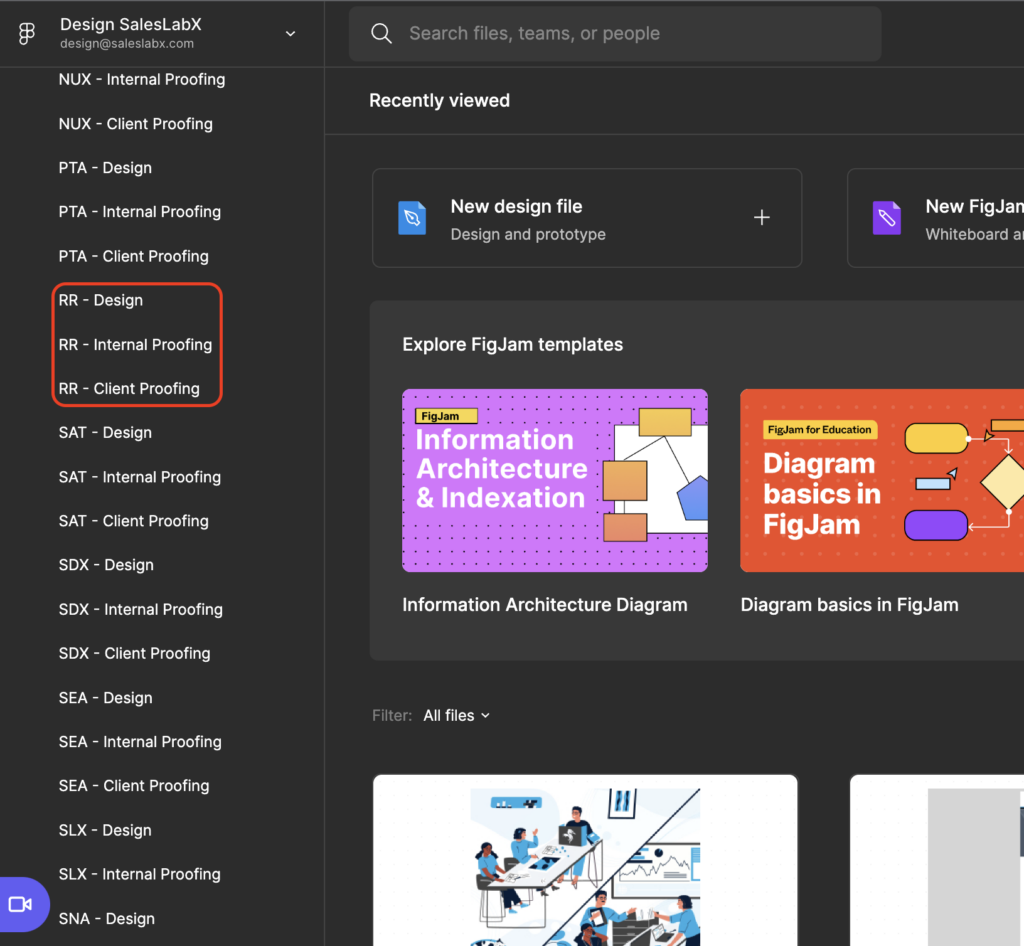
Internal folders include:
External folders include:

How Figjam is used (be specific about the tools)
By internal team:
For QA:

Generating a PDF from a Figjam Link
Best Practices/Notes
(Pronounced “Par • daat” not “Par • doh”)
Pardot is Salesforce’s marketing automation tool and one of the main platforms we offer services for. Whether you’ve had experience with Pardot before or not, you’ll be learning a lot on an on-going basis. Much of what we do for clients in Pardot centers around marketing automation, lead generation, and design. Review the resources below to get started with a general overview of Pardot:
Internal Recordings
The below recordings are informally recorded SLX training videos on Pardot. We will be updating these in the near future with more formalized training videos, but for now, please review the following links to get a general overview of Pardot’s features:
Salesforce is one of the biggest customer relationship management (CRM) platforms in the world. This is the other main platform that we offer services for. Even if you’ve had experience with Salesforce before, there’s plenty to learn about the platform on an on-going basis as well. While as a QA Specialist, you won’t need to know much about Salesforce to begin with, we encourage you to get a general understanding of the platform.
Not all of our clients have Salesforce, but for those who do – their needs also vary widely. We also recommend checking out modules on Trailhead – Salesforce’s learning platform that offers a series of online tutorials, interactive assessments, and more. You can sign up for a free Trailhead account through your Google account. Read more about Trailhead here. Here are just a few suggested modules:
Salesforce Certification
While we have Salesforce specialists on our team, that doesn’t mean you can’t become one too! If you’re interested in getting Salesforce certified, we’ll pay for it.
This Internal Design process outlines how client tasks are assigned to our Creative Team, and how our various teams collaborate towards completing design tasks. Please review the following process in detail and continue to reference it as needed. Any updates to the process will also be updated on the page. If you need additional help or clarification, please reach out to your team lead.
We also have a condensed version of our process here if you just need a quick refresher without all the details.
This detailed QA Process outlines how to QA our various types of assets at different stages of our design process. Please review the following process in detail and continue to reference it as needed. Any updates to the process will also be updated on the page. If you need additional help or clarification, please reach out to your team lead.
Coming soon!
Recommended Bookmarked Sites:
Recommended Chrome Plugins:
Not sure which AC is associated with which account(s) and which accounts have what plan? Check out the handy dandy Account Ownership spreadsheet below.
FAQs coming soon. For now, if you have any questions, please contact Shan Koay.
If you need assistance logging into our Client portals, please refer to the Client Login Cheat Sheet for detailed instructions on accessing each of our active clients’ accounts.
Last Updated: April 27, 2022
As we continue to improve this training manual to be as helpful and clear as possible, there will be ongoing updates. We always welcome feedback and suggestions on the current version. Thank you!